


Cutscenes
Cutscene System
The Cutscene System in Zimension allows creators to create cinematic camera sequences inside a world. Cutscenes are event-driven, configurable visually, and integrated with logic, states, and transitions.
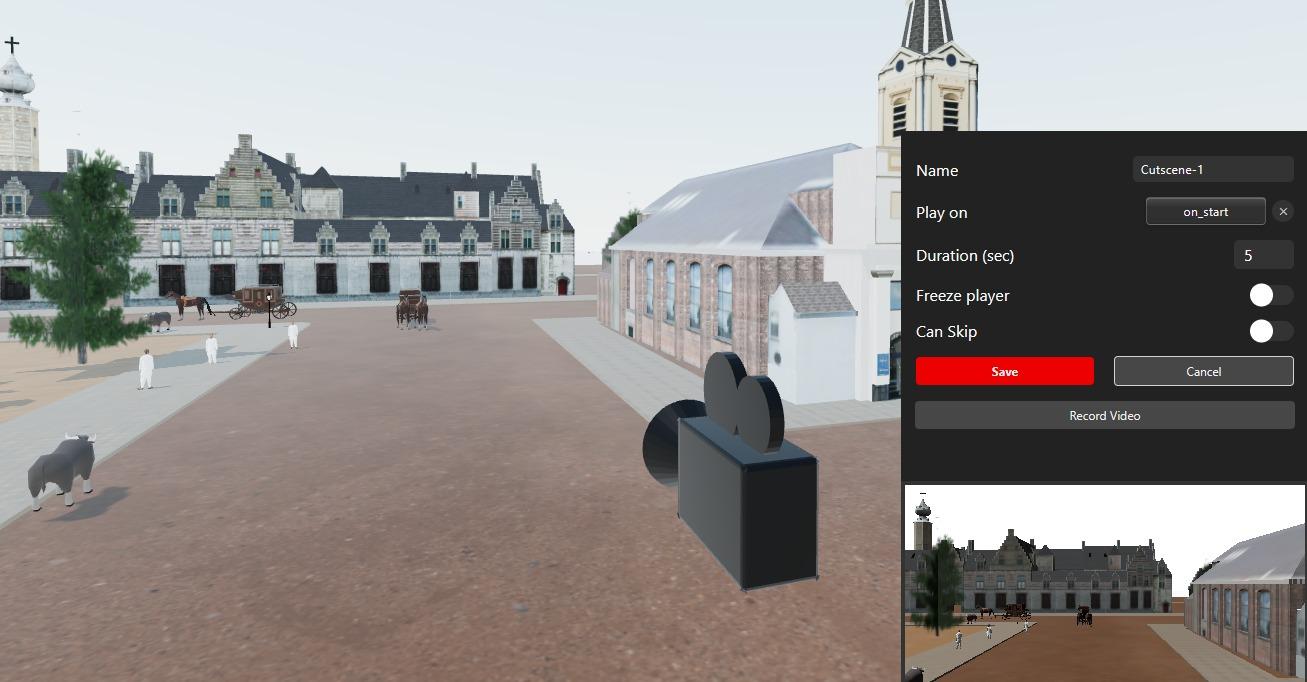
Cutscenes are commonly used for:
- Story introductions
- Camera fly-throughs
- Focus moments (boss reveal, location highlight)
- Tutorials and guided sequences
- End or win sequences
1. What is a Cutscene?
A Cutscene is a timed camera sequence that:
- Plays on a specific event
- Uses camera movement, states, and transitions
- Can freeze player control
- Can be skipped (optional)
A cutscene does not require scripting.
2. Cutscene Configuration
Cutscene Name
- Unique name for the cutscene
- Examples: Cutscene-Intro, BossReveal, WinScene
Play On Event
- Select an Event - the cutscene starts when this event is triggered
Duration (sec)
- Total duration of the cutscene in seconds
Freeze Player
- When enabled, player movement and input are disabled
- Recommended for cinematic or story moments
Can Skip
- Allows the player to skip the cutscene
- Useful for replayability
3. Camera Settings
Camera Manipulation
- Move - Adjust camera position in 3D space
- Rotate - Adjust camera orientation
- Scale - Scale control if required
Camera Transform
- Position: X, Y, Z
- Rotation: X, Y, Z
- Scale: X, Y, Z
Field of View (FOV)
- Lower values → cinematic zoom
- Higher values → wide environment shots
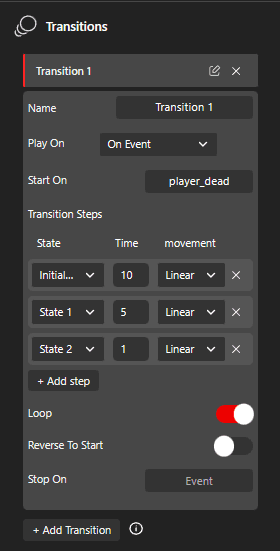
4. States and Transitions
States
- Different camera positions or setups within a cutscene
- Initial State is the starting camera position
- Add multiple states for camera movement
Transitions
- Define how the camera moves between states
- Smooth camera movement and timed interpolation
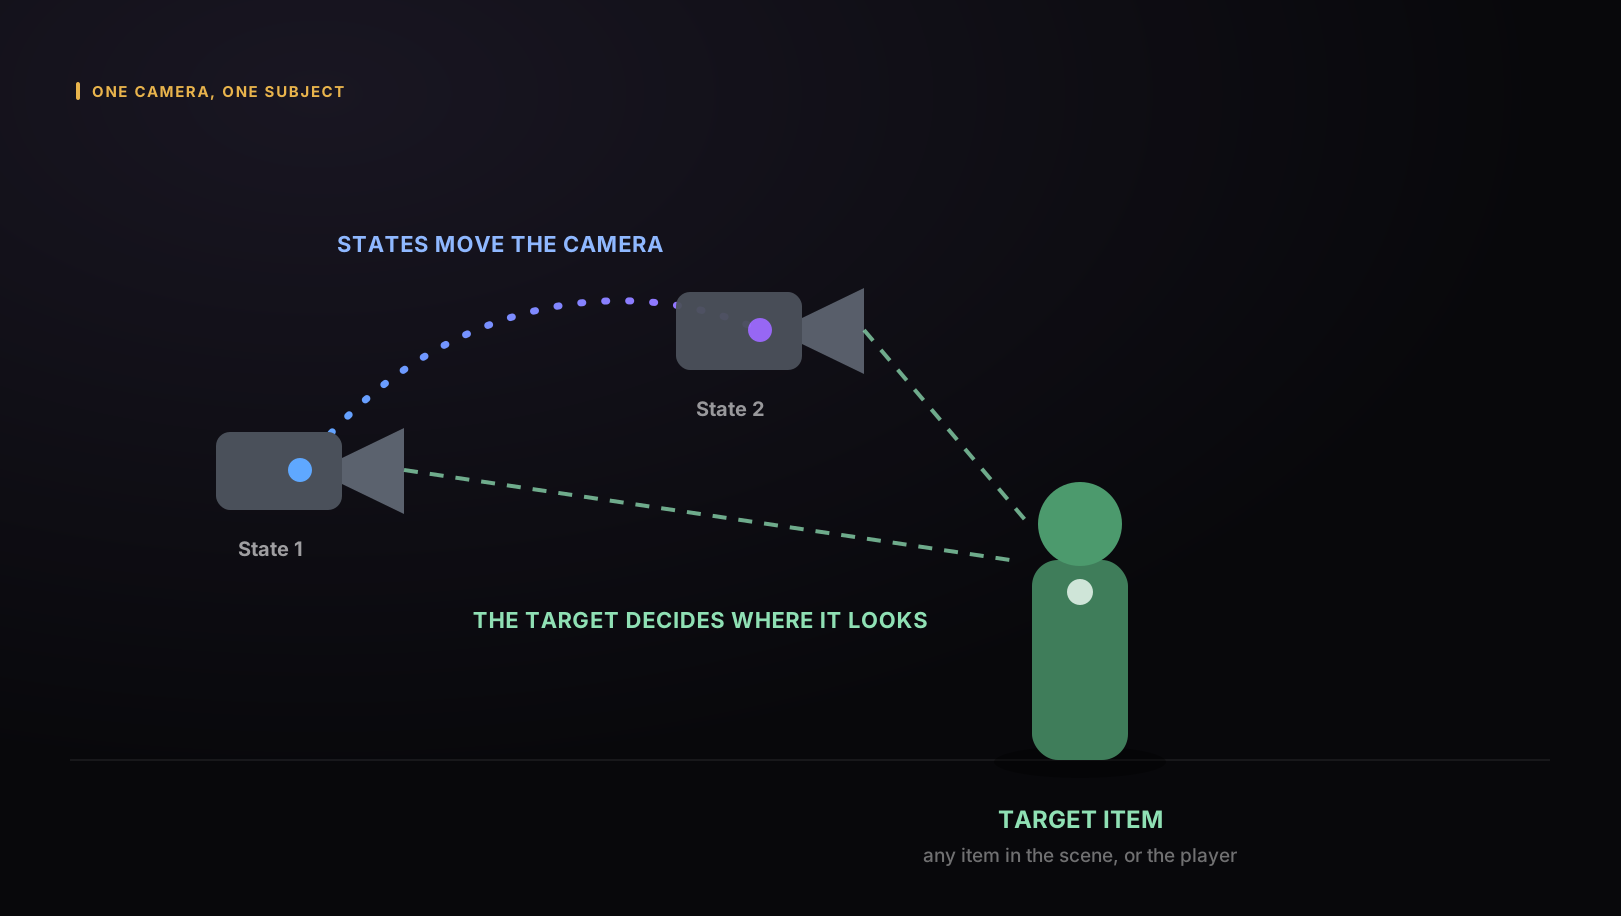
5. Camera Targets
A Target keeps the cutscene camera pointed at an item or at the player. States and transitions still decide where the camera goes. The target only decides where it looks, so a simple move between two states becomes a shot that stays on your subject. Use a target whenever the cutscene camera should follow the player, a character, or any other item.
Adding a Target
- Create or open a cutscene. Its camera is selected and the Camera Setting panel opens.
- Scroll to Targets and click + Add Target.
- Pick what to look at, then choose how the target switches on.
Target Settings
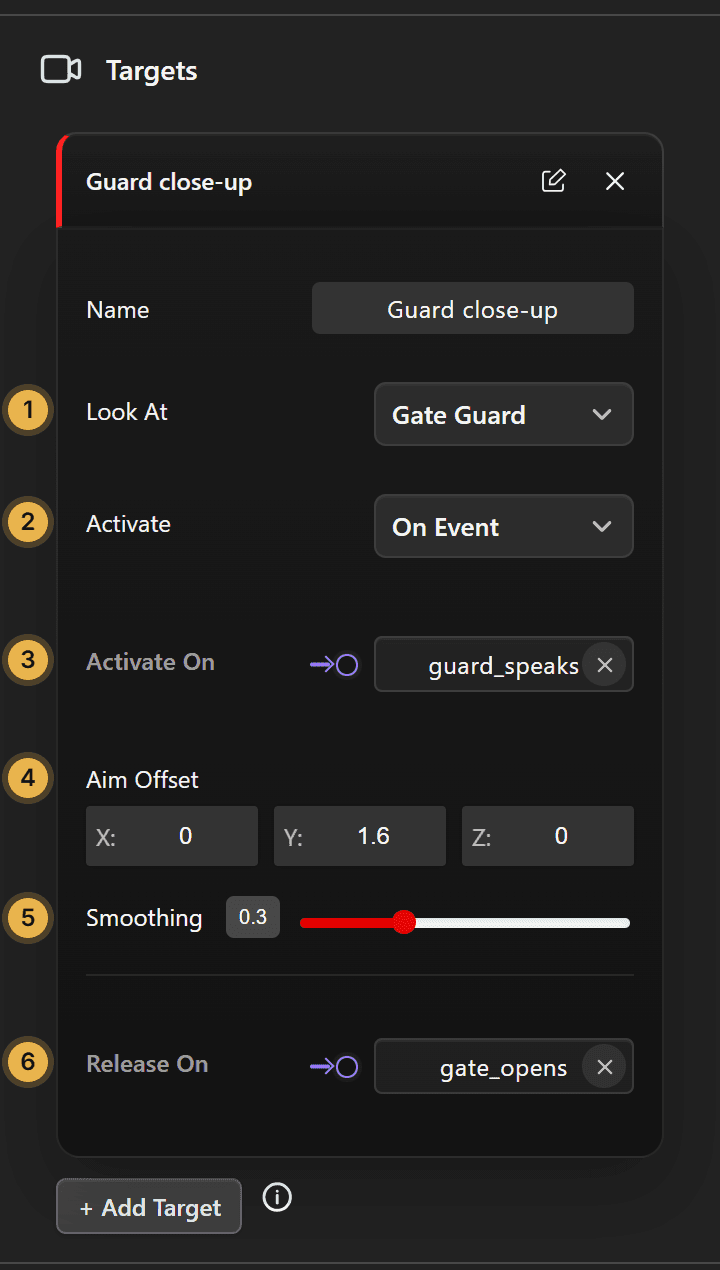
- 1Look At - The item to keep in frame. Any item in the current scene is listed, plus Player. Until you pick one, the target does nothing.
- 2Activate - On Event switches the target on when an event fires. Auto means the camera is already looking at the target when play starts. If several targets are set to Auto, the first one in the list is used.
- 3Activate On - The event that switches the target on. Required when Activate is On Event.
- 4Aim Offset - Moves the point the camera aims at away from the item's position. An item's position is often at its base, so raising Y aims at a character's face instead of their feet.
- 5Smoothing - How quickly the camera turns onto the subject. 0 locks on instantly. Higher values ease in, and 1 takes about a second. The default is 0.3.
- 6Release On - Optional. The event that switches the target off. The camera goes back to the rotation of its current state.
While a target card is open in the panel, the editor viewport and the camera preview show what that target frames, so you can adjust the offset before playing. Close the card to go back to the state's own rotation.
Switching Targets with Events
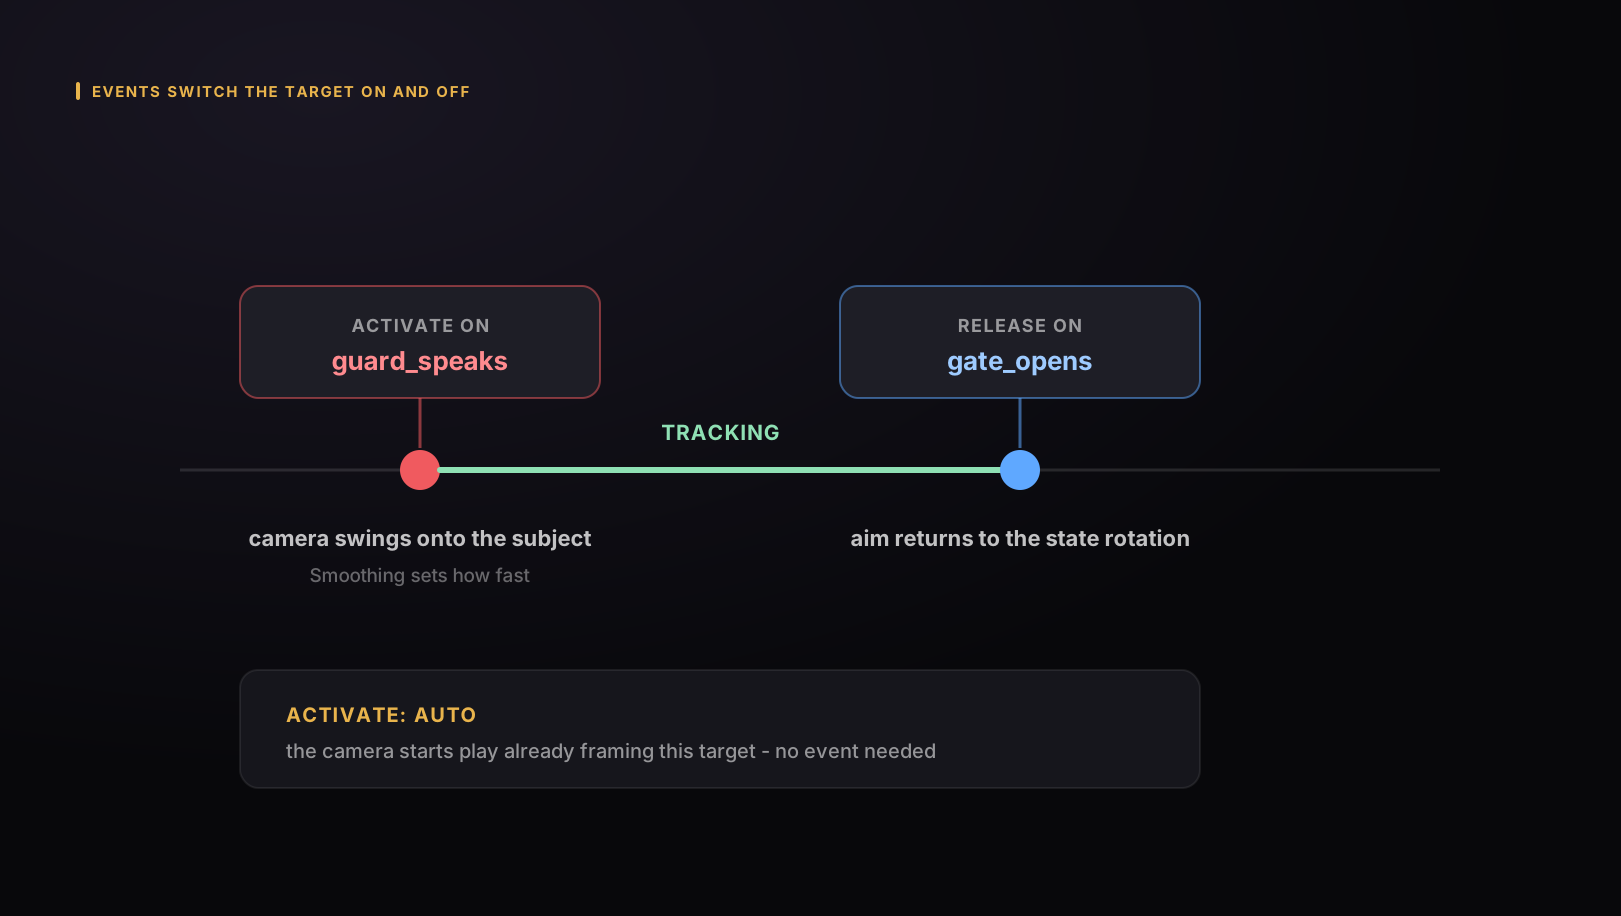
- The camera looks at one target at a time. Activating another target replaces the current one, so you do not need to release it first.
- If one event activates more than one target, the last one in the list wins.
- Release On only affects the target that is currently active. Releasing a target that is not in use does nothing.
- You can add several targets to one camera and cut between subjects with events, for example the guard while they speak and then the gate as it opens.
- When play stops, every target switches off and the camera returns to its state.
Targets with Transitions
- Transitions keep moving the camera while a target is active. The result is a tracking shot that stays on the subject.
- For a shot where the camera moves, set Smoothing to 0 so it stays locked on the subject for the whole move. Use higher Smoothing when the camera holds still and swings onto a new subject.
- On a Follow Path transition, turn off Look along path so the target controls the aim while the path moves the camera.
6. Example Use Cases
Intro Cutscene
- Play on game_start, freeze player, show environment
Boss Reveal
- Play on boss_area_enter, add a target that looks at the boss, and move the camera past it with a transition
Win Cutscene
- Play on game_over_win, set an Auto target on the Player, and circle the camera around them
7. Best Practices
- Keep cutscenes short (3-10 seconds)
- Always allow skipping for repeat plays
- Freeze player during story moments
- Use smooth transitions between states
- Use a target instead of rotating each state by hand when the camera should follow a subject
- Test on both mobile and desktop